
Holybro Pixhawk 4 (Discontinued)
PX4 v1.7 DiscontinuedWARNING
This flight controller has been discontinued and is no longer commercially available. It is still supported by PX4.
WARNING
PX4 does not manufacture this (or any) autopilot. Contact the manufacturer for hardware support or compliance issues.
Pixhawk 4® is an advanced autopilot designed and made in collaboration with Holybro® and the PX4 team. It is optimized to run PX4 v1.7 and later, and is suitable for academic and commercial developers.
It is based on the Pixhawk-project FMUv5 open hardware design and runs PX4 on the NuttX OS.
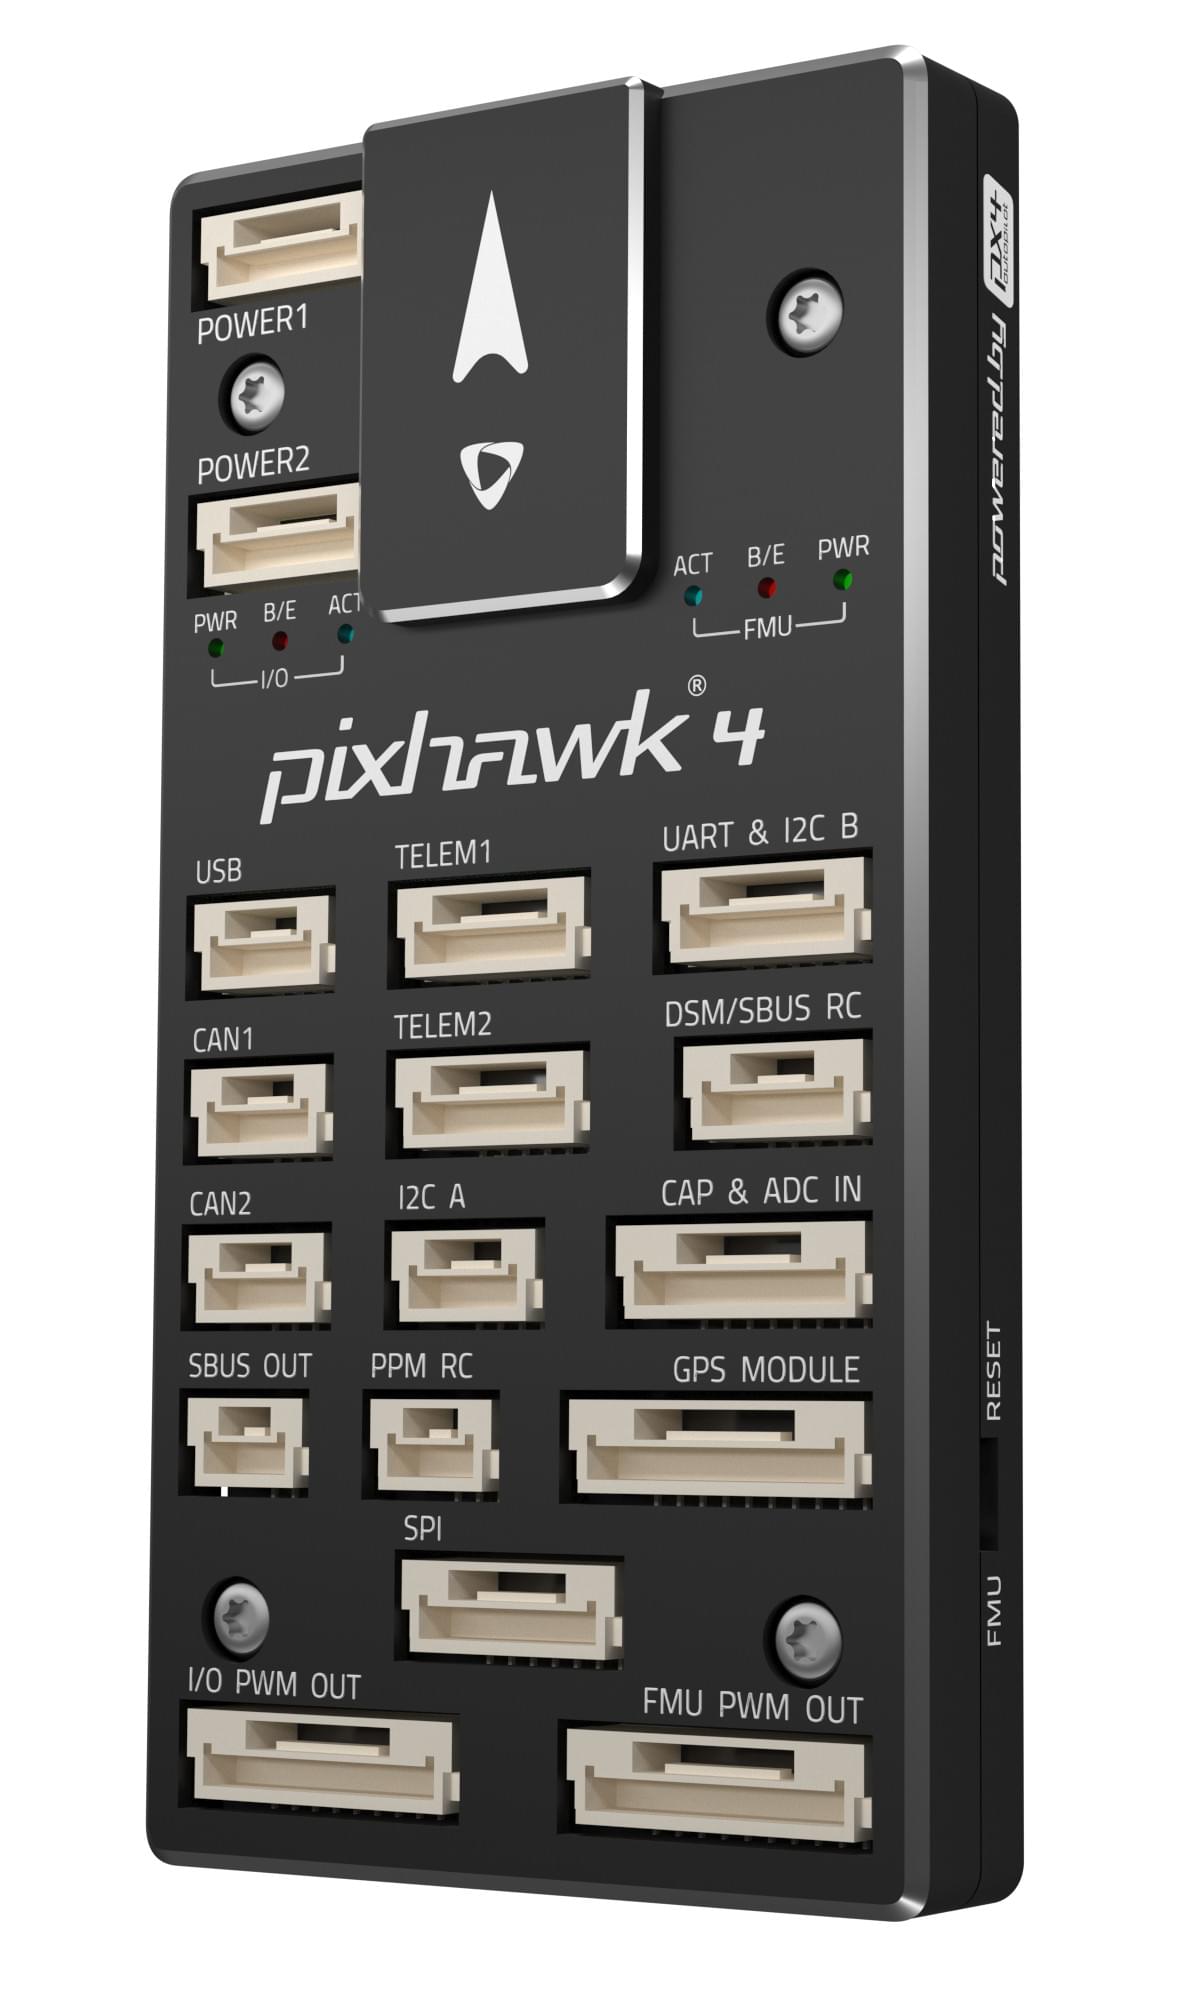
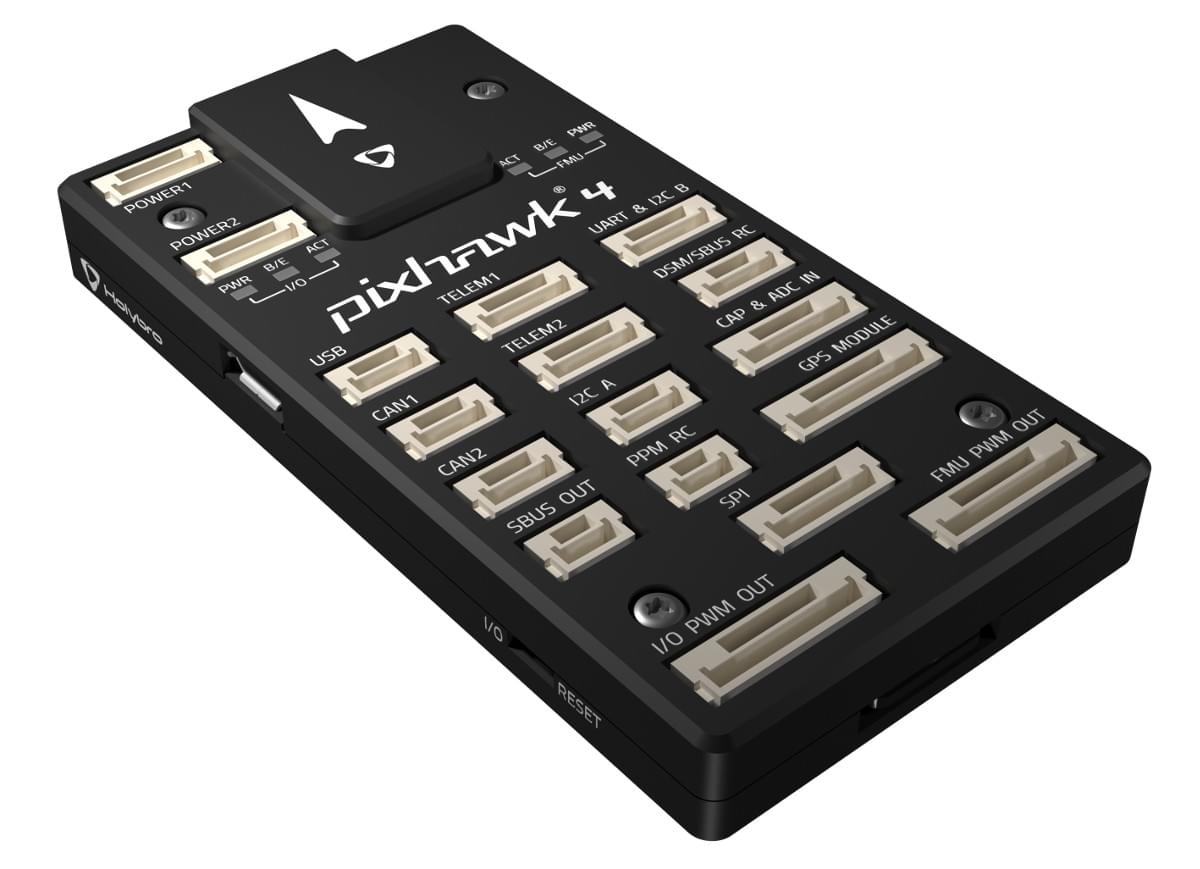
TIP
This autopilot is supported by the PX4 maintenance and test teams.
Specifications
Processor
- Main FMU processor: STM32F765 (32 Bit Arm® Cortex®-M7, 216 MHz, 2 MB flash, 512 KB RAM)
- IO processor: STM32F103 (32 Bit Arm® Cortex®-M3, 72 MHz, 64 KB SRAM), or STM32F100 (32 Bit Arm® Cortex®-M3, 24 MHz, 8 KB SRAM) on earlier boards
Sensors
- IMU: ICM-20689 (SPI1), and BMI055 or ICM-20602 (SPI1)
- Barometer: MS5611 (SPI4)
- Magnetometer: IST8310 (I2C3)
- GPS module (external): u-blox Neo-M8N GPS/GLONASS receiver, with integrated IST8310 magnetometer
Interfaces
- PWM outputs: 16 (8 IO
MAIN, 8 FMUAUX) - Capture inputs: 3 dedicated PWM/capture inputs on FMU
- Serial ports: 4 (
GPS MODULE,TELEM1,TELEM2,UART & I2C B) - I2C buses: 4 (I2C3 internal; I2C1 on
GPS MODULE, I2C2 onUART & I2C B, I2C4 onI2C A) - SPI buses: 4
- CAN buses: up to 2, for dual CAN with serial ESC
- USB: Micro-USB
- RC input: dedicated input for CPPM, and dedicated input for Spektrum/DSM and S.BUS with analog/PWM RSSI input
- S.BUS output: dedicated S.BUS servo output
- Parameter storage: FRAM (SPI2)
- SD card: MicroSD slot
Electrical Data
- Input voltage: 4.9 V to 5.5 V (
POWER1,POWER2), 4.75 V to 5.25 V (USB) - Max input voltage: 6 V (
POWER1,POWER2,USB) - Servo rail input: 0 V to 36 V
- Power monitoring: analog inputs for voltage and current of 2 batteries, up to 120 A
Mechanical Data
- Dimensions: 44 × 84 × 12 mm
- Weight: 31.2 g (plastic case), 48.5 g (aluminium case)
- Operating temperature: -40 °C to 85 °C
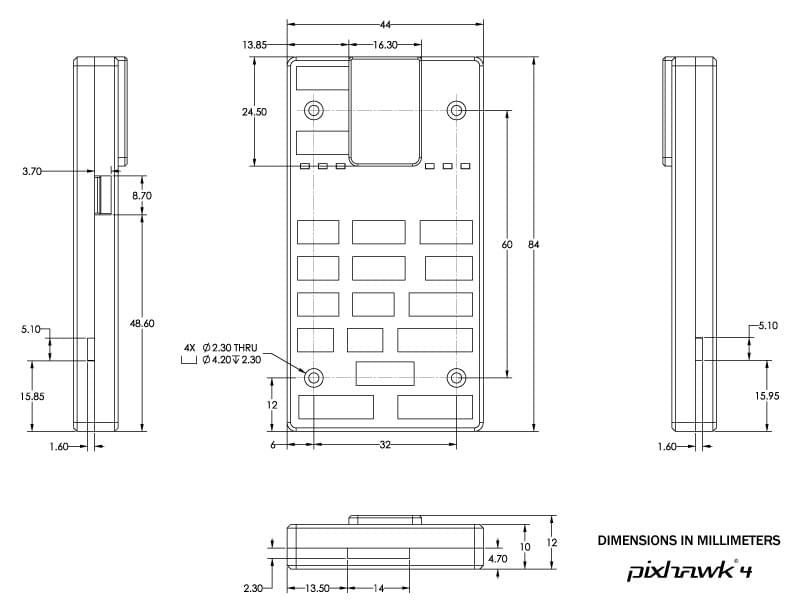
Additional information can be found in the Pixhawk 4 Technical Data Sheet.
Where to Buy
Holybro (No longer available).
Pinouts
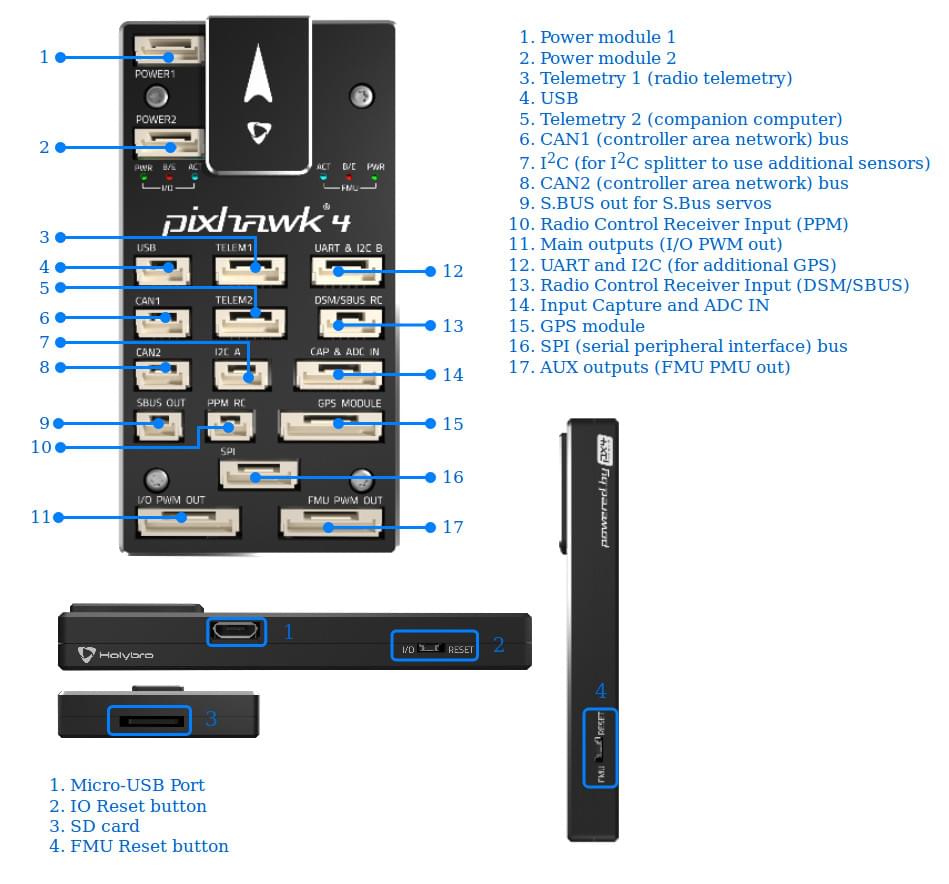
WARNING
The DSM/SBUS RC and PPM RC ports are for RC receivers only. These are powered! NEVER connect any servos, power supplies or batteries (or to any connected receiver).
Download Pixhawk 4 pinouts from here.
INFO
Connector pin assignments are left to right (i.e. Pin 1 is the left-most pin). The exception is the debug ports (pin 1 is the right-most, as shown below).
Power
The POWER1 and POWER2 ports are 6-pin inputs for analog power modules, which supply the board and report battery voltage and current. See Pixhawk 4 Wiring Quick Start > Power for wiring, and Battery and Power Module Setup for configuration.
Voltage Ratings
Pixhawk 4 can be triple-redundant on the power supply if three power sources are supplied. The three power rails are: POWER1, POWER2 and USB.
INFO
The output power rails FMU PWM OUT and I/O PWM OUT (0 V to 36 V) do not power the flight controller board (and are not powered by it). The output rails must be separately powered if it needs to power servos or other hardware. You must supply power to one of POWER1, POWER2 or USB, or the board will be unpowered.
Normal Operation Maximum Ratings
Under these conditions all power sources will be used in this order to power the system:
POWER1andPOWER2inputs (4.9 V to 5.5 V)USBinput (4.75 V to 5.25 V)
Absolute Maximum Ratings
Under these conditions the system will not draw any power (will not be operational), but will remain intact.
POWER1,POWER2andUSBinputs (operational range 4.1 V to 5.7 V, 0 V to 6 V undamaged)- Servo input:
VDD_SERVOpin ofFMU PWM OUTandI/O PWM OUT(0 V to 42 V undamaged)
PWM Outputs
The Pixhawk 4 has 8 IO PWM outputs (MAIN) on the I/O PWM OUT port, and 8 FMU PWM outputs (AUX) on the FMU PWM OUT port.
DShot can be used on FMU outputs 1-4 (group1). Bidirectional DShot is not supported.
The 8 FMU outputs are in 3 groups:
- Outputs 1-4 in group1 (Timer1)
- Outputs 5-6 in group2 (Timer4)
- Outputs 7-8 in group3 (Timer12)
All outputs within the same group must use the same output protocol and rate.
The 3 capture inputs (FMU_CAP1 to FMU_CAP3, Timer2) are on the CAP & ADC IN port, and appear in the actuator configuration as PWM Capture 1-3. They can also be used as extra PWM or OneShot outputs.
SD Card (Optional)
The Pixhawk 4 has a MicroSD card slot. See SD Cards and Pixhawk 4 Wiring Quick Start > SD Card.
Serial Port Mapping
| UART | Device | Port | Flow Control |
|---|---|---|---|
| USART1 | /dev/ttyS0 | GPS MODULE (GPS1) | |
| USART2 | /dev/ttyS1 | TELEM1 | Yes |
| USART3 | /dev/ttyS2 | TELEM2 | Yes |
| UART4 | /dev/ttyS3 | UART & I2C B (TELEM4) | |
| USART6 | /dev/ttyS4 | DSM/SBUS RC | |
| UART7 | /dev/ttyS5 | FMU Debug (Console) | |
| UART8 | /dev/ttyS6 | PX4IO |
Assembly
The Pixhawk 4 Wiring Quick Start provides instructions on how to assemble required/important peripherals including GPS, Power Management Board etc.
Radio Control
A remote control (RC) radio system is required if you want to manually control your vehicle (PX4 does not require a radio system for autonomous flight modes). You will need to select a compatible transmitter/receiver and then bind them so that they communicate.
- Spektrum/DSM and S.BUS receivers connect to the
DSM/SBUS RCport. A Spektrum/DSM receiver takes 3.3 V from pin 4, and an S.BUS receiver takes 5 V from pin 1. - PPM receivers connect to the
PPM RCport. PWM receivers, which have one wire per channel, need a PPM encoder. - CRSF and GHST receivers connect to a free
TELEMport. Enable the driver by setting RC_CRSF_PRT_CFG or RC_GHST_PRT_CFG to that port.
GPS & Compass
Connect a GPS module to the 10-pin GPS MODULE port, which also carries its compass (I2C), safety switch, safety LED and buzzer. The board also has an internal IST8310 compass. A second GPS can be connected to the UART & I2C B port: set GPS_2_CONFIG to TELEM/SERIAL 4. See Pixhawk 4 Wiring Quick Start and Mounting a GPS/Compass.
Telemetry Radios (Optional)
A telemetry radio can be connected to TELEM1 without further configuration. You can also connect one to any spare serial port, such as TELEM2, and configure MAVLink on that port.
CAN
The CAN1 and CAN2 ports can be used for DroneCAN peripherals. DroneCAN is not enabled by default: set UAVCAN_ENABLE to enable it.
Building Firmware
TIP
Most users will not need to build this firmware! It is pre-built and automatically installed by QGroundControl when appropriate hardware is connected.
To build PX4 for this target:
make px4_fmu-v5_defaultDebug Port
The PX4 System Console (UART7) and SWD interface run on the FMU Debug port, while the IO console and SWD interface can be accessed via the I/O Debug port. In order to access these ports, the user must remove the Pixhawk 4 casing.
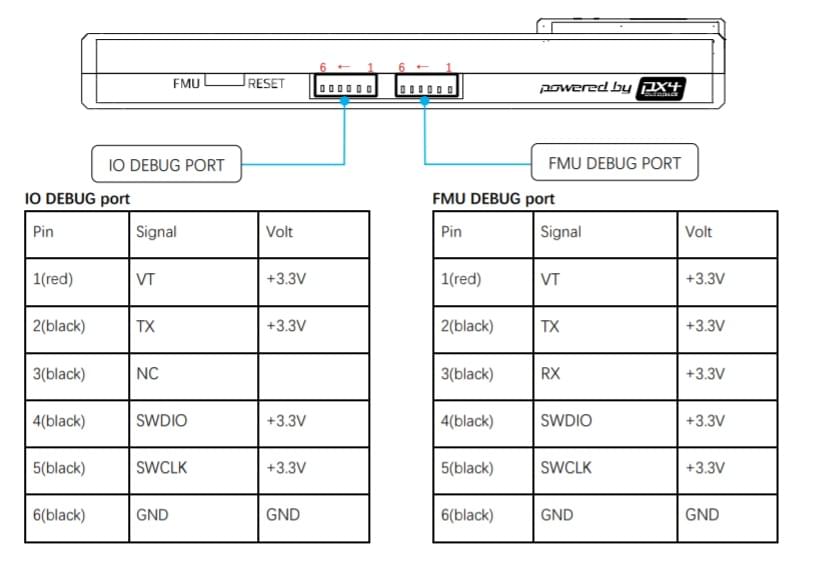
The pinout uses the standard Pixhawk debug connector pinout: both debug ports are Pixhawk Debug Mini ports. For wiring information see:
Peripherals
Supported Platforms / Airframes
Any multicopter / airplane / rover or boat that can be controlled with normal RC servos or Futaba S.BUS servos. The complete set of supported configurations can be seen in the Airframes Reference.